The Ultimate Guide to Making Snow Sculptures
Ready to dive into the fluffy, sparkling world of snow sculpture making? There's something absolutely magical about a fresh snowfall—it transforms our yards into a blank canvas, just waiting for our creativity to bring it to life. Gone are the days of just building snowmen; let's think bigger and bolder! Whether it's a family of snow animals, a frosty fort, or even a mythical snow dragon, the possibilities are as endless as our imagination. So, grab your mittens, rally the troops, and let's get ready to create some snowy masterpieces that'll make your winter extra special. It's time to turn those piles of snow into works of art that'll have the whole neighborhood talking. Let's make this snow day one to remember, filled with laughter, creativity, and a whole lot of snowy fun!

Photo Credit: Bartz Snow Sculptures
In this article (use the links to jump to the sections you are interested in):
Choose Your Snow Sculpture Design
Before going out into your snowy art studio, it’s time for the most creative part of your snow sculpture journey – choosing your design! This step is where your collective imagination comes to life, where every flake of snow holds the potential for something extraordinary. Let's embark on this creative process together, transforming your snowy blanket into a canvas of wonder.
Family Brainstorming Session
Gather your family in a cozy setting, maybe by the fireplace or around the dining table. This is the time to dream big and let every voice be heard. While the snowman is a classic, encourage your children to think outside the box - what would they love to see in snow? A gigantic snow cake? A snow replica of your pet? The possibilities are endless.
Encourage Sketches: Hand out paper and pencils and let everyone sketch their ideas. It doesn’t matter if the drawings are perfect; it’s about capturing the essence of their imagination. If you have little ones or your family isn’t the best at sketching, you can also bring some magazines or books to create a collage or just use for brainstorming.
Storytelling Inspiration: Sometimes, the best ideas come from stories. Share tales of yetis, brave knights defending their castles with snowballs, or magical winter forests to spark ideas.
Respect All Ideas: Ensure that each family member’s ideas are heard and respected. This activity should be a confidence-building exercise, showing kiddos that their creativity matters.
Need Some Inspiration?: Check out these creative snow sculpture ideas.
Combine Ideas for a Collaborative Masterpiece
In a family full of different ideas, finding a way to combine them into one sculpture can be an interesting challenge. Perhaps one child wants a snow dog, another a castle. Why not create a scene where a snow dog guards a majestic castle? This collaborative effort teaches compromise and teamwork, essential skills in both art and life.
Vote on Ideas: If there are too many ideas, have a family vote. Discuss the feasibility of each idea and what would make it exciting to build.
Build on Each Other’s Ideas: Encourage family members to build on each other's suggestions. Maybe someone’s idea for a simple snowman evolves into a snowman cowboy wrangling on a snowy ranch.
Plan Your Design
With your idea in hand, it’s time to start planning. This step is crucial, especially for more complex sculptures. Discuss the size and dimensions – how tall, how wide, and how deep should your sculpture be? Consider the amount of snow you have and the space available in your yard.
Visualize the Structure: Walk out to where you’ll build your sculpture. Visualize where each part will be and how it will all come together.
Safety Considerations: For larger sculptures, talk about safety. How can you ensure that it’s stable and secure?
Incorporate Learning: This planning stage is a great opportunity to infuse some learning. Discuss the science of snow, the physics behind building stable structures, or the art principles involved in creating visually appealing forms.
As you embark on this creative journey, remember that the process of choosing and planning your snow sculpture is as valuable as the finished product. It’s a time for bonding, for sharing laughs and dreams, and for learning from one another. So embrace this creative process with open hearts and minds, ready to transform your snowy landscape into a testament of your family's imagination and spirit. Let the snow sculpting begin!
Gather Your Snow Sculpture Tools
Alright, let's gear up for your snow sculpting adventure! Having the right tools can turn a good day of snow sculpting into a fantastic one. While nature has already given you the most important ingredient—snow!—a few additional tools can help bring your imaginative designs to life. Here's a mix of household items and a few handy tools you can find online, perfect for both novice and experienced snow artists.
Household Items Turned Sculpting Tools
Shovels and Buckets: Grab at least one sturdy shovel for piling up the snow and buckets of various sizes for moving snow around and shaping your creation.
Old Kitchen Utensils: Spatulas, large spoons, and slotted spoons are great for carving and smoothing snow. Use various sizes of plastic containers or cookie cutters to mold and shape the snow.
Spray Bottles: Repurpose old spray bottles for adding water to compact the snow or even to spray food coloring for a touch of color.
Paint Scrapers: These are fantastic for smoothing large surfaces and adding detail.
Special Snow Sculpting Tools
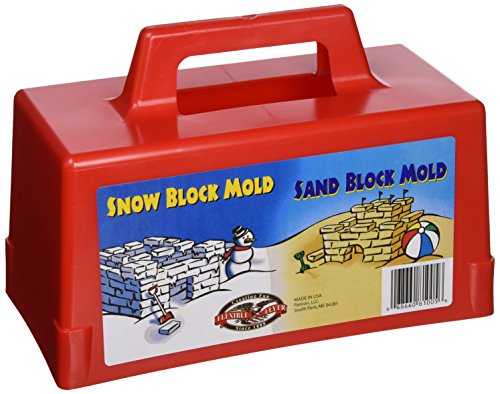
Snow Block Mold: A simple yet effective tool for creating uniform bricks, perfect for building forts or detailed structures.
Sand Molding Tools: While these kits often come with molds and carving tools specifically designed for sand, they are actually perfect for snow, too!
Kid-Friendly Shovels: Lightweight and easy to handle, these shovels are perfect for little hands to help in the snow sculpting process.


Dress for the Occasion
Warm Clothing: Remember, staying warm and dry is key to enjoying your time in the snow. Layer up with thermal wear, waterproof snow pants, and jackets, and don’t forget those warm socks and boots!
Waterproof Gloves: Keeping hands warm and dry is crucial. Opt for waterproof gloves or mittens that offer mobility and grip.
Waterproof Knee Mat or Pads: For those who plan to spend a lot of time kneeling in the snow, knee pads can provide extra comfort and protection.


Dressed for success with these tools in hand, your snow sculpting session is bound to be a hit. They not only make the process easier but also open up new possibilities in what we can create.
Build a Strong Foundation
Now that you’ve let our imaginations run wild with delightful designs and gathered our tools, it’s time to focus on a crucial step in our snow sculpting journey – building a strong foundation. Just like any great masterpiece, a snow sculpture needs a solid base to stand the test of time (or at least until the next sunny day). This part of the process is about combining fun with a bit of practical know-how to ensure your creations are not only fantastic but also sturdy and safe. Get your gloves on and dive into the snowy fun of building a foundation that’s as strong as your family’s creative spirit!
Safety First
Safety should always be the top priority. Always keep an eye on kids as they build, especially with larger structures. As you progress, keep checking the stability of your sculpture. Make sure that any tunnels or arches are safe and won’t collapse. Okay, on to the fun part…
Start with the Right Snow
Evaluate the Snow: Not all snow is created equal for sculpting. We're looking for snow that's moist enough to stick together, much like the consistency of a good snowball. If the snow is too powdery and light, it might be challenging to mold.
Test the Snow: Have the kids make a small snowball and see if it holds its shape. This simple test can determine if the snow is ready for sculpting or if it needs a little help.
Create the Perfect Sculpting Snow: If you find that the snow is too fluffy and not sticking, don't fret! A simple solution is to lightly mist the snow with water using a spray bottle. This can add the necessary moisture to make the snow more malleable. Remember, this is a delicate balance – too much water can turn your snow into an icy, unworkable mess.
Create the Base
Build a Large Mound: Start by piling up the snow into a large mound. This will be the base of your sculpture. Make it bigger than you think you need; the bigger the mound, the more freedom you’ll have to sculpt. It’s easier to remove snow than to add it later. Encourage the kids to help with shoveling – it's a great workout and a lot of fun.
Pack the Snow: Once you have your mound, it’s time to pack the snow down. This can be a fun family activity – everyone can take turns stepping on the mound, patting it down with shovels, or even giving it a good, solid hug to compress the snow. This is also the step where you can have a snowball fight or two – it’s all part of the process!
Shape the Base: Begin to shape your base according to your design. If you’re building a snow animal, this might be the body; for a castle, it might be the central tower. The key here is to make the shape rough – finer details will come later.
Incorporate Learning
Discuss Structure and Design: As you build, talk about why certain shapes are more stable. Discuss the basic principles of architecture and design – how does a dome hold up, or what makes a wide base more stable? You could talk about famous buildings and how their foundations are designed to support them.
The Science Behind Snow: Dive into the science of snow – why does snow have different textures at different times? How does the temperature affect its ability to pack? These discussions not only add an educational twist but also help children understand and appreciate the medium they’re working with.
Creating a robust foundation for your snow sculpture is an enriching experience that goes beyond just playing in the snow. It’s a chance to bond as a family, to learn about the fascinating world of science and engineering, and most importantly, to have loads of fun. Let’s step into the winter air and start building a foundation that will hold up your magnificent snow creations.
Shape and Carve Your Sculpture
The time has come to delve into the enchanting world of shaping and carving your snow sculpture. This is where the true magic happens, where your ideas and sketches begin to take form in the snow. It's a process filled with gentle touches, creative decisions, and lots of laughter.
Shaping Your Snow Sculpture
Initial Shaping: Begin by marking out the rough dimensions of your sculpture on the snow mound. If it's an animal, for example, create larger mounds for the body and smaller ones for the head and limbs. Use a shovel for the larger adjustments and your hands for the smaller ones. It's like being a snow DJ, mixing and molding until you start to see the basic shape of your creation.
Add Dimensions and Volumes: Once you have the basic outline, it's time to add volume. Build up areas that need to be higher or more prominent. This is where the sculpture starts getting its personality. For instance, if you're sculpting a snow bear, this is when you make its belly round and its ears perky.
Refine the Outline: Now, refine the shape of your sculpture. Smooth out the rough edges, define the curves, and make sure the proportions are just right. It's a bit like sketching, but with snow. Every swipe and pat should bring you closer to seeing your design come to life.
Carving Details into Your Sculpture
Add Features: Now, let’s add personality to our creation. For an animal, carve out the eyes, nose, and mouth. For a building, etch windows and doors. Use tools like paint scrapers or butter knives for finer details. This step requires patience and a gentle touch – small, careful movements can make a big difference.
Create Texture: Texture can make your sculpture stand out. You can use a fork to create the effect of fur or a comb for a wood effect. Each tool can create a unique pattern in the snow, adding depth and realism to your sculpture. Experiment with different tools to see what effects they create on the snow.
Smooth and Perfect: Once you’re happy with the shape and details, it’s time for the finishing touches. Smooth out any rough areas and clean up loose snow. Stand back, look at your sculpture from different angles, and make any final adjustments.
Snow sculpting is a dance between imagination and reality, a playful exercise that brings families closer and turns an ordinary winter day into a canvas of creativity and joy. So, embrace this moment, let your artistic spirits soar, and create something that makes you all smile with pride and joy.
Add Color and Accessories
Now that your magnificent snow sculptures have taken shape, it's time to add a dash of color and a sprinkle of accessories to bring them to vibrant life. This stage is all about channeling your inner artists and personalizing your frosty creations, infusing them with character, and transforming them into eye-catching pieces of art. This part is not just about beautifying; it's about expressing your family's unique flair and creativity.
Bring Color into Play
Colorful Sprays: One of the easiest ways to add color to your snow sculpture is to mix water with food coloring in spray bottles. Let the kids choose their favorite colors and gently spray the snow to add vibrant hues. You can create patterns, paint specific parts, or even give your sculpture a rainbow makeover.
Natural Dyes: For a more eco-friendly option, consider using natural dyes. Beet juice for red, turmeric for yellow, or blueberry juice for blue can be great alternatives. It’s a fun way to experiment with natural resources and learn about plant-based colors.
Accessorize Your Snow Creation
Add Facial Features: For snow creatures or characters, use small stones, sticks, or even vegetables to create facial features. A carrot for a nose or coal for eyes are classic, but feel free to get creative – how about leafy eyebrows or a pinecone mouth?
Dress It Up: Old hats, scarves, or gloves can add personality to your sculpture. If you’ve made a snow animal, a little hat or a scarf can make it look adorable. For snow people or characters, dressing them up can bring out their story.
Themed Accessories: Depending on your sculpture’s theme, adding thematic accessories can enhance its appeal. For instance, a crown made of twigs for a snow queen, a shield fashioned from a trash can lid for a snow knight, or even a wood-made treasure chest for a snow pirate.
Incorporate Educational Elements
Learn About Colors: As you add color to your snow sculptures, it’s a great opportunity to teach kids about primary and secondary colors and how they blend. You can even talk about color symbolism – what does red symbolize versus blue?
Cultural and Historical References: Use the accessorizing phase to delve into cultural or historical stories. If you’re dressing up a snow sculpture as a historical figure, share their story. It’s a fun way to integrate history and culture into your snow day activities.
Remember, the goal is to have fun and let your creativity shine. There are no rules to how you can color or accessorize your snow sculpture. This is the time to experiment, laugh, and maybe even learn a little. So go ahead, let your imagination run wild, and watch as your snow sculpture becomes a colorful beacon of your family's creativity and joy.
Preserve and Share Your Snowy Creation
As we reach the end of our snow sculpting adventure, it's time to think about preserving and sharing these beautiful, albeit temporary, works of art. Snow sculptures, with all their charm and whimsy, are fleeting by nature, which makes capturing and sharing them even more special. Let’s talk about how to immortalize these precious snowy creations and share the joy they bring with others.
Photograph Your Snow Art
The Right Angle: Take photos from different angles to capture the full essence of your sculpture. Get down low for dramatic shots or take aerial shots if you can. Each angle tells a different story.
Time of Day: Experiment with different times of day for various lighting. Early morning and late afternoon often provide the best natural lighting for outdoor photography.
Include the Family: Make sure to take photos of the family with the sculpture. These aren’t just pictures of snow; they’re memories of the laughter, teamwork, and love that went into creating them.
Sharing Your Winter Wonders
Social Media Showcase: Share your snow sculpture photos on social media. It’s a delightful way to spread some winter cheer and inspire others to get creative. Use hashtags like #SnowSculptureFun or #WinterArtistry, or tag us (@MischiefMakersClub) for a chance to be featured in our community showcase!
Community Engagement: If you have a neighborhood or community group, share your photos there. It’s a fantastic way to connect with your neighbors and maybe even start a friendly snow sculpture competition.
Reflect on the Beauty of the Moment
The Impermanence of Snow Art: Discuss with your kids the impermanent nature of snow sculptures and the beauty of enjoying them in the moment. It’s a wonderful life lesson about enjoying experiences as they come and cherishing memories.
Creative Journaling: Encourage your kids to write or draw about their snow sculpting experience in a journal or a storybook. This can be a reflective exercise, capturing their thoughts, feelings, and learnings from the day.
As you wrap up your snow sculpting journey, let's take a moment to appreciate the beauty you’ve created and the joy it has brought your family. Snow sculptures may melt away, but the memories will last forever. Here’s to all the amazing snow sculptures you’ve created – may they inspire stories, smiles, and more snowy adventures in the future!
Read Next:
Join the Conversation: Are you new to snow sculpting or a seasoned pro? Let us know your questions or tips in the comments.